


So, you’d like to take a passport photo with your iPhone, but you’re unsure how to get the best results? Or if passport agents will accept your DIY picture?
Say no more.
In this detailed, step-by-step guide, I’ll show you how to take passport photos on an iPhone quickly and reliably.
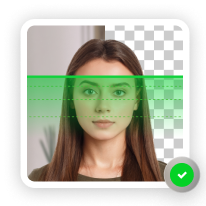
Get a compliant passport photo in 3 minutes with PhotoAiD’s passport photo maker.
- Upload or take a photo.
- Let the PhotoAid Al check and fix it.
- A compliance expert will verify the result.
- Download or order a print. Done!


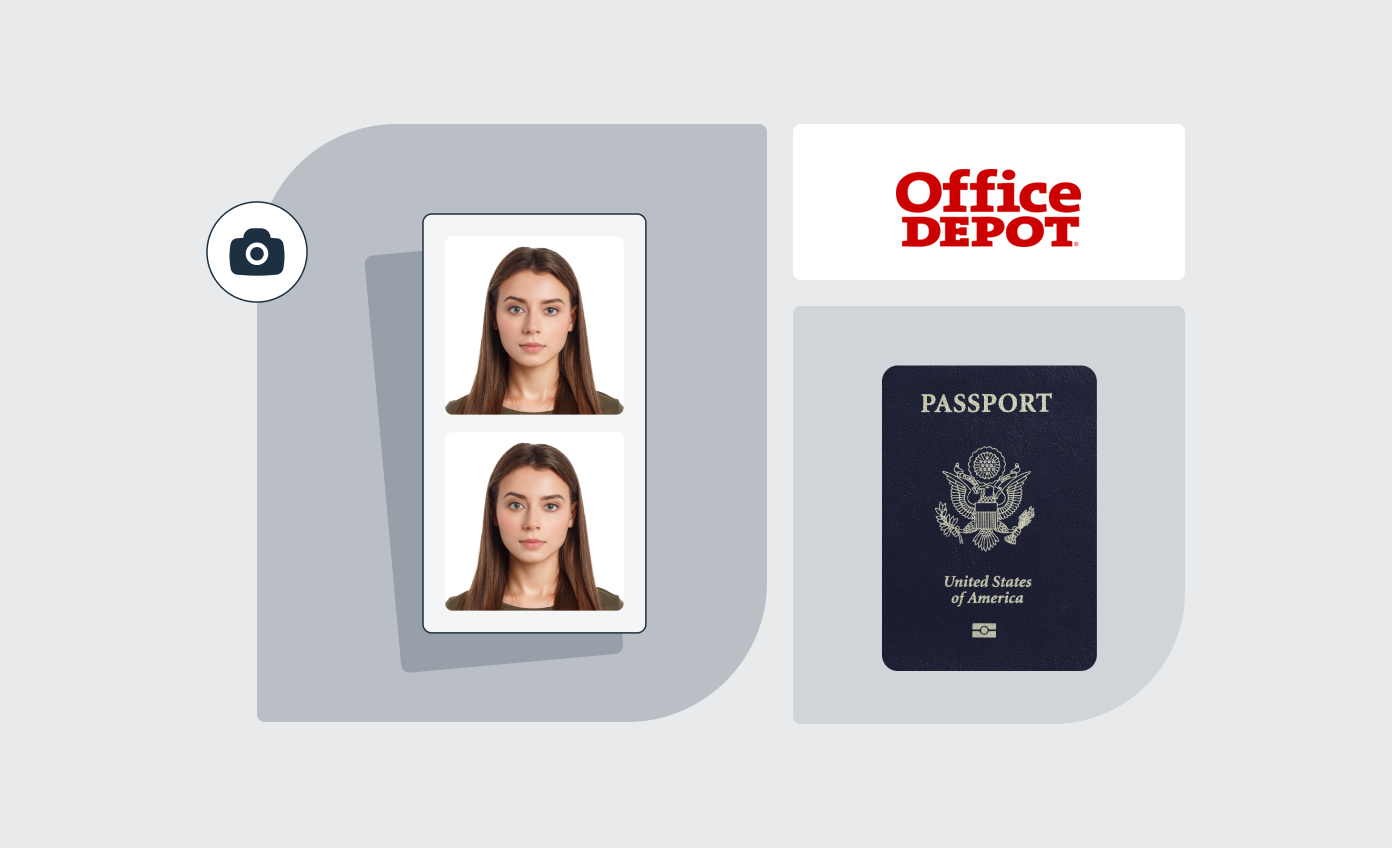
Get a digital passport photo or order prints with help from PhotoAiD®
100% acceptance, expert verified
2x money-back guarantee
3 minutes and done
11,000,000+ happy users
I was pressed for time and couldn’t get hold of a photographer. I found PhotoAiD, took a selfie, uploaded it, and had a compliant passport photo almost instantly. Getting a photo for my baby girl was a breeze, too!
Related reading:
- 8 Paid & Free Passport Photo Apps to Take Your Own Photos
- How to Take a Passport Photo With an Android Phone
- How To Make a Passport Size Photo From Mobile—Guide
- Printing Passport Photos on 4×6 Inch Paper

How to Take a Passport Photo With an iPhone [6 Steps]
Taking a passport photo using an iPhone is easy. In fact, it takes six steps to go from a selfie-like picture to a compliant US passport photo. Here are the steps:
- Study official passport photo requirements.
- Adjust your iPhone settings for a passport photo.
- Find the right spot.
- Prepare yourself for the photoshoot.
- Take a photo.
- Edit the photo.
Let me now walk you through each step.
1. Study official passport photo requirements
Taking passport-quality photos at home is almost as easy as snapping selfies. Still, you need to know what you’re doing. Here’s a list of the essential US passport photo requirements your iPhone passport photo must meet:
| Rule | Description |
|---|---|
| Size | 2×2 inches or 51×51 mm |
| Digital dimensions | 600×600 pixels (square aspect ratio) |
| Head measurements | Your head should be between 1 inch and 1⅜ inches (25 mm and 35 mm) from the bottom of your chin to the top of your head. |
| Background | The background must be plain white or off-white. No patterns, shadows, or other objects should be visible in it. |
| Quality | Passport pictures should be in color, with proper lighting and focus. There should be no visible pixelation, glare, or shadows on your face. Portrait mode isn’t allowed. |
| Digital edits | You’re not allowed to alter the photo. Removing the red-eye effect, blemishes, or altering your natural skin tones is strictly prohibited. |
| Facial expression | Keep your eyes fully open and mouth closed. Smile gently without showing your teeth or squinting. Face the camera directly. |
| Photo composition | The photo should include your head and the upper part of your shoulders. There should also be white space between the top of your head and the image’s edge. |
| Headgear | Head coverings are allowed only for religious or medical reasons. Remove all hair accessories and prescription glasses (you can wear them only under specific medical conditions). |
| Resolution | At least 300 DPI (dots per inch) |
| Recency | Taken in the last six months |
Are bangs allowed in passport photos? Can you wear a white shirt? To find answers to these (and more) questions, read our articles on passport photo hair rules and what to wear for a passport photo.
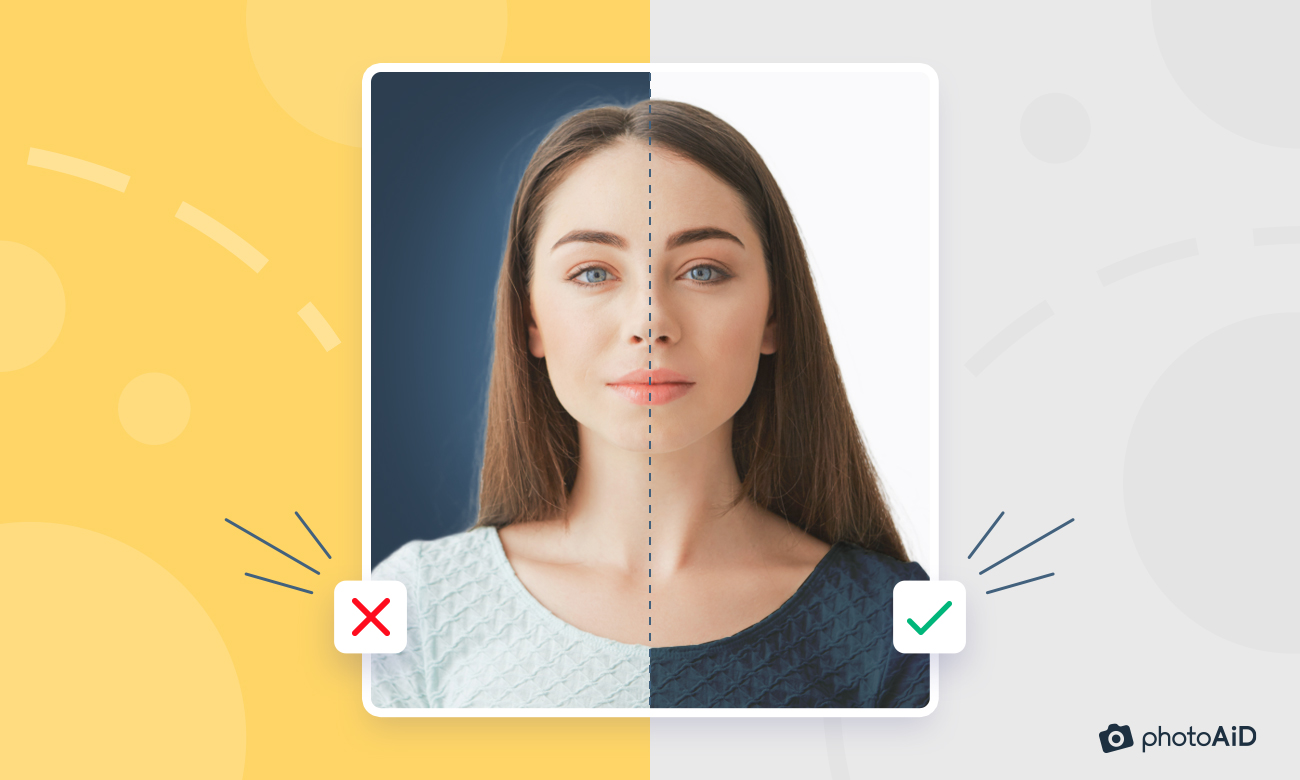
Otherwise, here’s a sample of what a good and bad passport photo should look like. Should you need more examples of passport photos, check this visual guide.
![Comparison of a good and bad passport photo: Quality, facial expression, background color, and more.]](https://photoaid.com/blog/wp-content/uploads/2024/10/Good-and-bad-passport-photo-comparison-1-1024x678.png)
2. Adjust your iPhone settings for a passport photo
Now, let’s adjust your iPhone camera setting for taking passport size photos:
- Go to “Settings” and scroll down to “Camera.”
- Tap on “Formats.”
- Select “High Efficiency.”
- In “Photo Capture,” click “Photo Mode” and select the highest resolution available. Remember that the resolution is for the rear camera.
With your settings adjusted, you should be able to secure an iPhone photo of high quality and resolution. Now, let’s check your composition settings:
Go back to Settings→Camera and look for the “Composition” section. Then:
- Activate “Grid” and “Level” (the slider must turn green). These two will help you when taking a passport photo with the iPhone’s camera app.
- Deactivate the “Mirror Front Camera” option. You don’t want your face mirrored if you take a picture using the selfie camera.
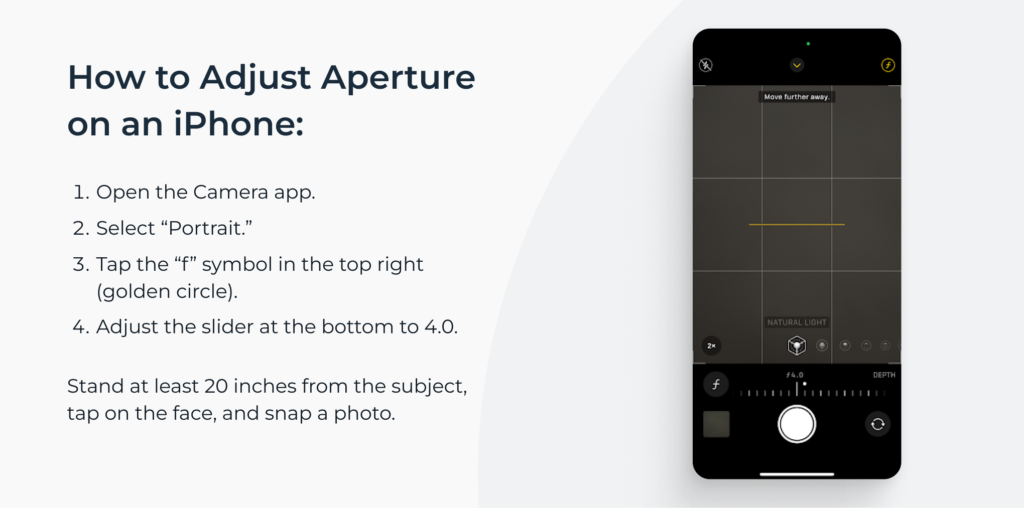
Do you have an iPhone 15? I reached out to a professional Syndey-based photographer, Dominic Bleijie, for a tip on making the best out of the new features:
Apple’s iPhone 15 has an improved in-camera sensor, which can help you take high-quality headshots, good enough for passport photos. To enhance the photograph’s depth, set your iPhone’s aperture to f/4.0 and focus on the subject’s face. By doing this, it’ll have less shallow depth of field and thus look sharp with the face in focus.
3. Find the right spot
What’s the best setting for passport photos? Go for a well-lit room with a window to stand in front of. I suggest you take a few mock pictures at different angles to find the right spot.
All in all, there’s no solid rule. You’re good to go as long as your face is lit evenly and there are no shadows.
Pro tip: If you can access professional lights (e.g., softbox lamps), place them to your left and right at a ~30-degree angle to ensure even lighting.
4. Prepare yourself for the photoshoot
Your iPhone and a home-made studio are all set up—now it’s time for you to get ready for the photoshoot. While the official requirements can be overwhelming, you should focus on one goal: Avoid an ugly passport photo by keeping things simple.
Here’s best way to take a passport photo on iPhone:
- Wear darker-colored clothes without patterns. Avoid thin-strapped tops (too revealing) and turtlenecks (unflattering).
- Keep makeup to a minimum. High-coverage products, contouring, shimmers, and glosses may likely turn unacceptable. Less is more.
- Remove prescription glasses and head coverings (unless you wear them for religious reasons), including hair accessories. If you have long bangs, use a tiny bobby pin to take them off your forehead.
- Opt for dainty jewelry like a thin necklace or stud earrings. Sparkly pieces tend to reflect light (we love them for the bling, right?) and won’t be accepted in passport photos.
- Tuck your hair behind the ears or tie it. Passport photo hair rules are lenient, so you’ll be fine as long as your face contour and eyebrows are visible.
Pro tip: White clothes aren’t acceptable for passport pictures because they’ll blend with the background. However, if you really want a white shirt or a blouse, throw on a dark jacket for contrast.
5. Take a photo

Lights, camera, action!
If you like visual guides, watch our short tutorial on how to take a passport-size photo from an iPhone. Here’s a recap of the steps:
- Place your device on a flat surface like a table or window sill. If possible, ask someone to photograph you.
- Stand or sit approximately 20 inches (50 cm) from your iPhone.
- Straighten your shoulders and look directly at the camera lens. Pro tip: Look at the upper horizontal grid on the screen. Depending on how you place your phone, your eyes should be either level with the line or a bit above it.
- Fit your head between the two vertical gridlines. By doing so, your face will be perfectly centered.
- Keep a neutral facial expression, or gently lift the corners of your lips. Your eyes must be fully open.
- Take several photos and select the one you like the most. Pro tip: Set up the camera timer for 10 seconds (when taking iPhone passport photos yourself). It’ll give you enough time to pose!
Take as many photos as you like. After all, there’s no photographer rolling their eyes or charging you extra for another photo. Once you get a photo you like, move on to the last step of making passport photos with an iPhone.
6. Edit the photo
Last but not least, it’s time for editing. To complete the process of turning an iPhone picture into a DIY passport photo, you must:
- Erase the background
- Resize and crop the image
Naturally, you can do it with free software like our free background remover or photo cropper. But unless you’re skilled at editing pictures, you have no guarantee the photo composition is correct or that there’s enough white space…let alone checking if you ticked off all the other requirements.
Here’s where PhotoAiD® steps in.
Our comprehensive service for compliant ID photos makes editing pictures quick and easy. You upload a self-portrait, and we take care of the rest.
Okay, but how can an app ensure an image taken at home meets the criteria? The answer is simple—
What separates us from other iPhone passport photo apps is human expert verification. Our photographers check uploaded images against the tiniest official requirements. Try our passport photo app for iPhone (or click the button below) and see for yourself.
![Benefits of taking passport photos with the PhotoAiD app for iOS.]](https://photoaid.com/blog/wp-content/uploads/2024/10/benefits-of-taking-passport-photos-with-PhotoAiD-for-iOS-1024x544.png)
See what our Trustpilot reviews say about the app:
“Quick and easy! Able to take and print passport photos in the comfort of my home. This is the 3rd time using (for various family members) and it works perfectly each time.” — Tyra Ivy (US)
“It was quick and easy to get the appropriate photo for my passport. I used the renew online option, which immediately accepted the photo. I finished the online passport renewal process in 10 minutes!” — SteveHibshman (US)
Avoid Common Passport Photo Mistakes: Expert Advice from 10,000+ Photos Analyzed
PhotoAiD has been on the market for over a decade, and our experts have verified millions of ID pictures. Earlier this year, we decided to examine the photos we’d processed to find the most common rejection reasons for ID photos.
10,000+ examined photos later, here are our tips on how to take a good passport photo with an iPhone:
1. Mind your position
Don’t take close-up photos; the upper part of your torso must be visible in the frame. Face the camera (no semi-profile orientation), and don’t tilt your head—the camera can’t be lower or higher than your eyes.
2. Choose good lighting conditions
Your face must be properly and evenly lit. To avoid shadows in a passport photo, ensure the light source is directly in front of you. The photo mustn’t be under or overexposed. Ideally, take a photo in daylight.
3. Keep a proper facial expression
Relax and keep a neutral facial expression. Wide or toothy smiles aren’t acceptable, so keep your mouth closed. Also, don’t squint—your eyes must be in full view and leveled with the camera lens.
4. Secure high quality
Stand still when taking a passport photo with your iPhone to avoid blur. Set the phone’s camera to the highest resolution and manage the light source so the picture isn’t grainy.
5. Mind your appearance
Take off prescription glasses unless you can provide a doctor’s note saying you need them for medical reasons. If you must keep them on, ensure no glare or reflections in the lenses. Additionally, pay attention to your hairstyle—there must be no hair covering your eyes, eyebrows, or face contour.
I highly recommend checking out the study linked above for more examples of common mistakes.
iPhone Passport Photo: Wrap-Up
Taking a US passport photo on your iPhone is possible and easy. As long as you remember the US Department of State’s requirements, you can secure a compliant picture from home.
Here are some highlights on how to take a 2×2 passport photo on an iPhone:
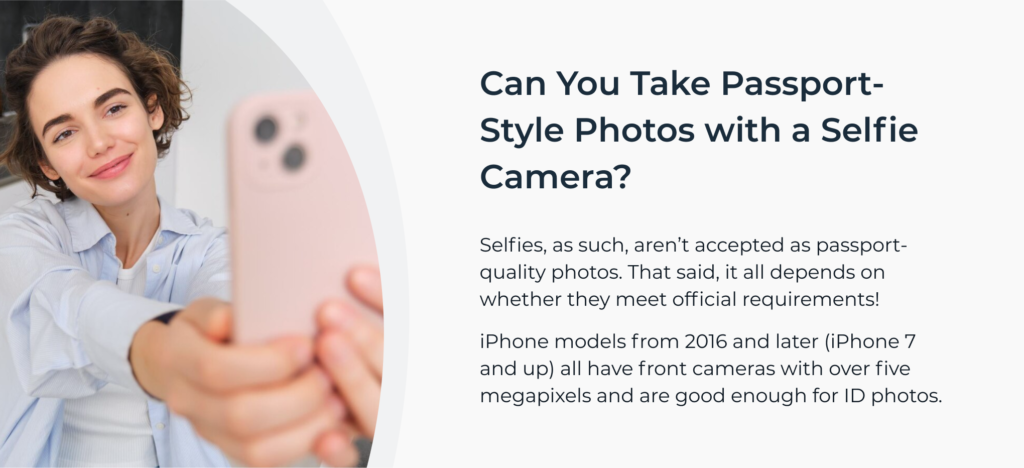
- iPhone models from 2016 or newer (iPhone 7 up) have cameras that are good enough to take ID pictures.
- While it’s best to ask someone to photograph you, using the front camera is fine.
- Selfies aren’t acceptable. Passport photos must meet specific requirements.
- You can edit iPhone passport photos using free tools, but there’s no acceptance guarantee.
And if you’re looking for the best way to click passport photos on an iPhone, use PhotoAiD®. Within minutes, you’ll secure a 100% compliant ID photo, or we’ll refund 200% of your purchase costs.
Getting an passport photo can be a hassle. Our tool makes the process fast, easy, and stress-free. Here’s how it works:

Upload an existing photo or take a new one.

Our AI handles sizing, lighting, and background removal. Then, one of our experts reviews every detail to ensure it meets official standards—24/7.

Download your perfected photo right away, print at home, or order prints with free shipping.
FAQ
Can you take your own passport photo?
Is there a free passport photo app for iPhone?
How do I crop a photo to passport size on an iPhone?
– Do it with PhotoAiD® (manual check and compliance guarantee).
– Use a free photo cropper (no compliance).
– Upload your image to the official US photo cropper (no compliance and unsuitable for passport renewal photos).
How to take a passport-size photo from an iPhone?
1. Take a self-portrait that complies with US passport photo requirements.
2. Upload it to our iPhone passport photo app.
3. Wait for our advanced AI to crop the image to the 2×2 size.
4. Wait for a manual verification.
5. Download a digital 2×2 passport photo or wait for printouts to be delivered (2–3 days, on average).
Can you use your iPhone to take a passport photo?
How to take a passport photo with an iPhone for free?
1. Take a self-portrait with your iPhone following the official requirements.
2. Erase the background with our free background remover.
3. Use our online photo cropper to resize the image for free.
That said, remember that free tools don’t guarantee compliance. Read our step-by-step guide on taking a passport photo on an iPhone and be sure the authorities accept it.
How to take a digital passport photo with iPhone?
However, if you want to use your own picture, ensure it’s:
– 600×600–1200×1200 pixels
– At least 300 DPI
– In a JPEG format
– 54KB–10MB in size
Click on this article to learn how to take a 2×2 photo on an iPhone (digital passport photo format).
Sources:
- https://www.apple.com/newsroom/2016/09/apple-introduces-iphone-7-iphone-7-plus/
- https://travel.state.gov/content/travel/en/passports/how-apply/photos.html
- https://travel.state.gov/content/travel/en/passports/how-apply/online-renewal-photo.html

Sylwia is a skilled writer with a BA in English Studies and an active SPJ member. For nearly three years now, she’s been writing captivating articles for international companies, turning her lifelong passion into a career.